Configure Deploy Actions
Adding a Development Deployment Stage
- Click Add stage below the Build section we just edited.
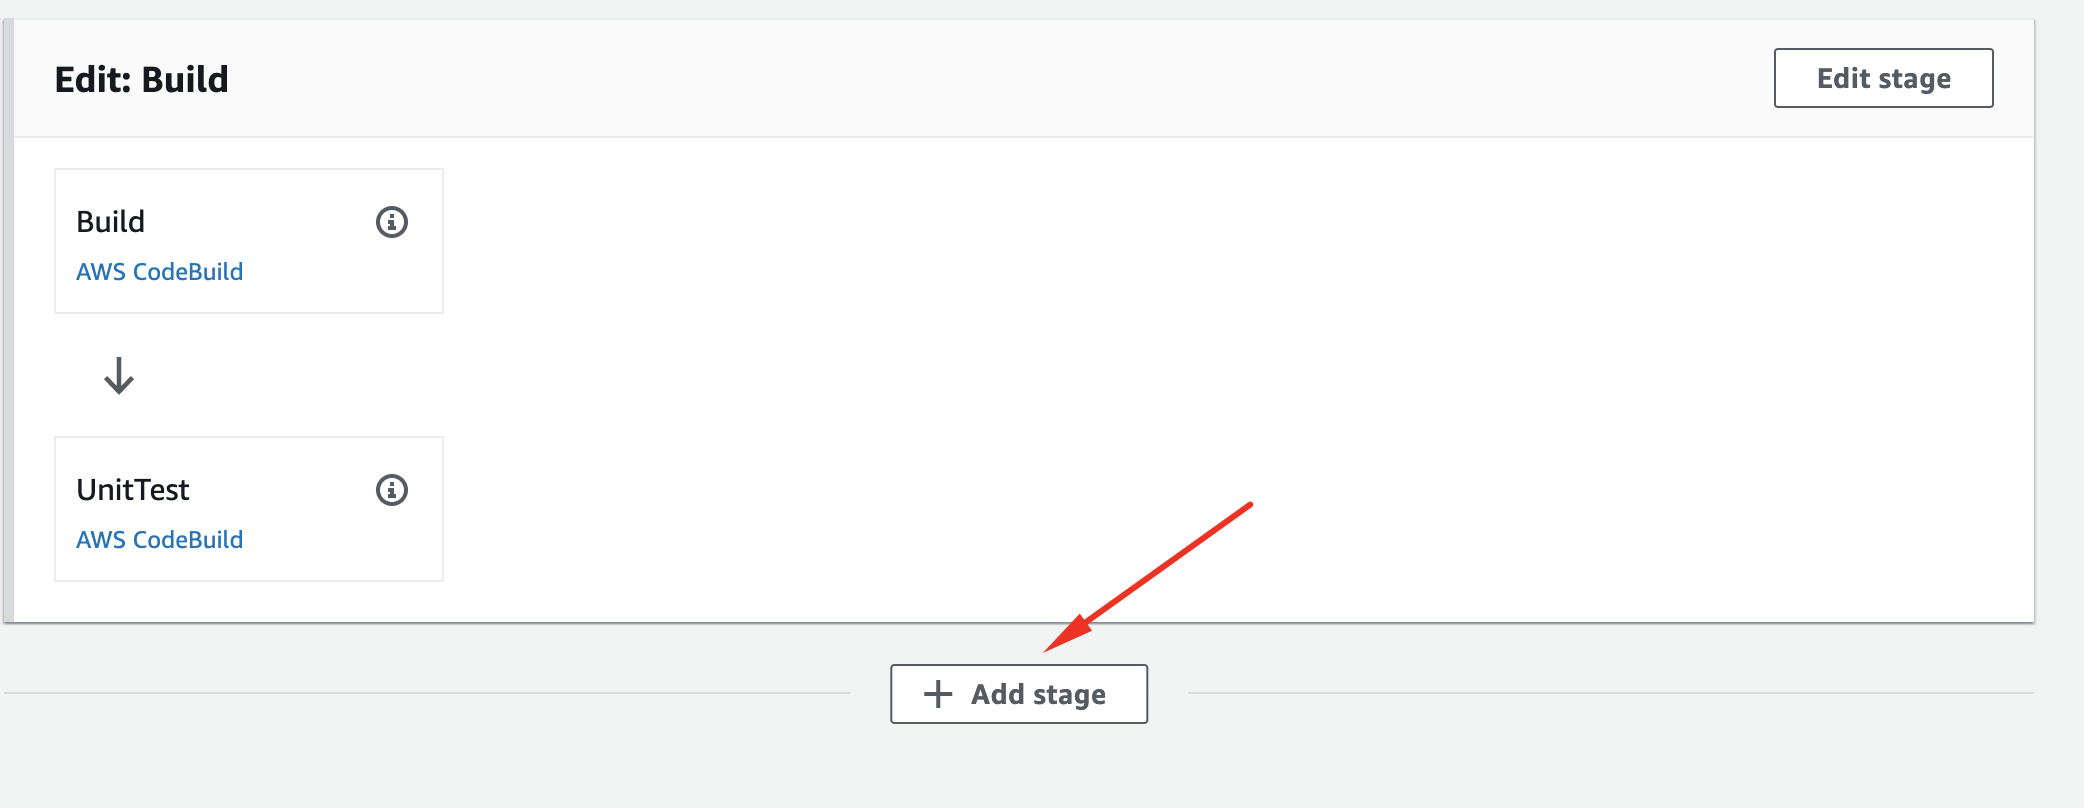
- Name it Dev, click Add stage
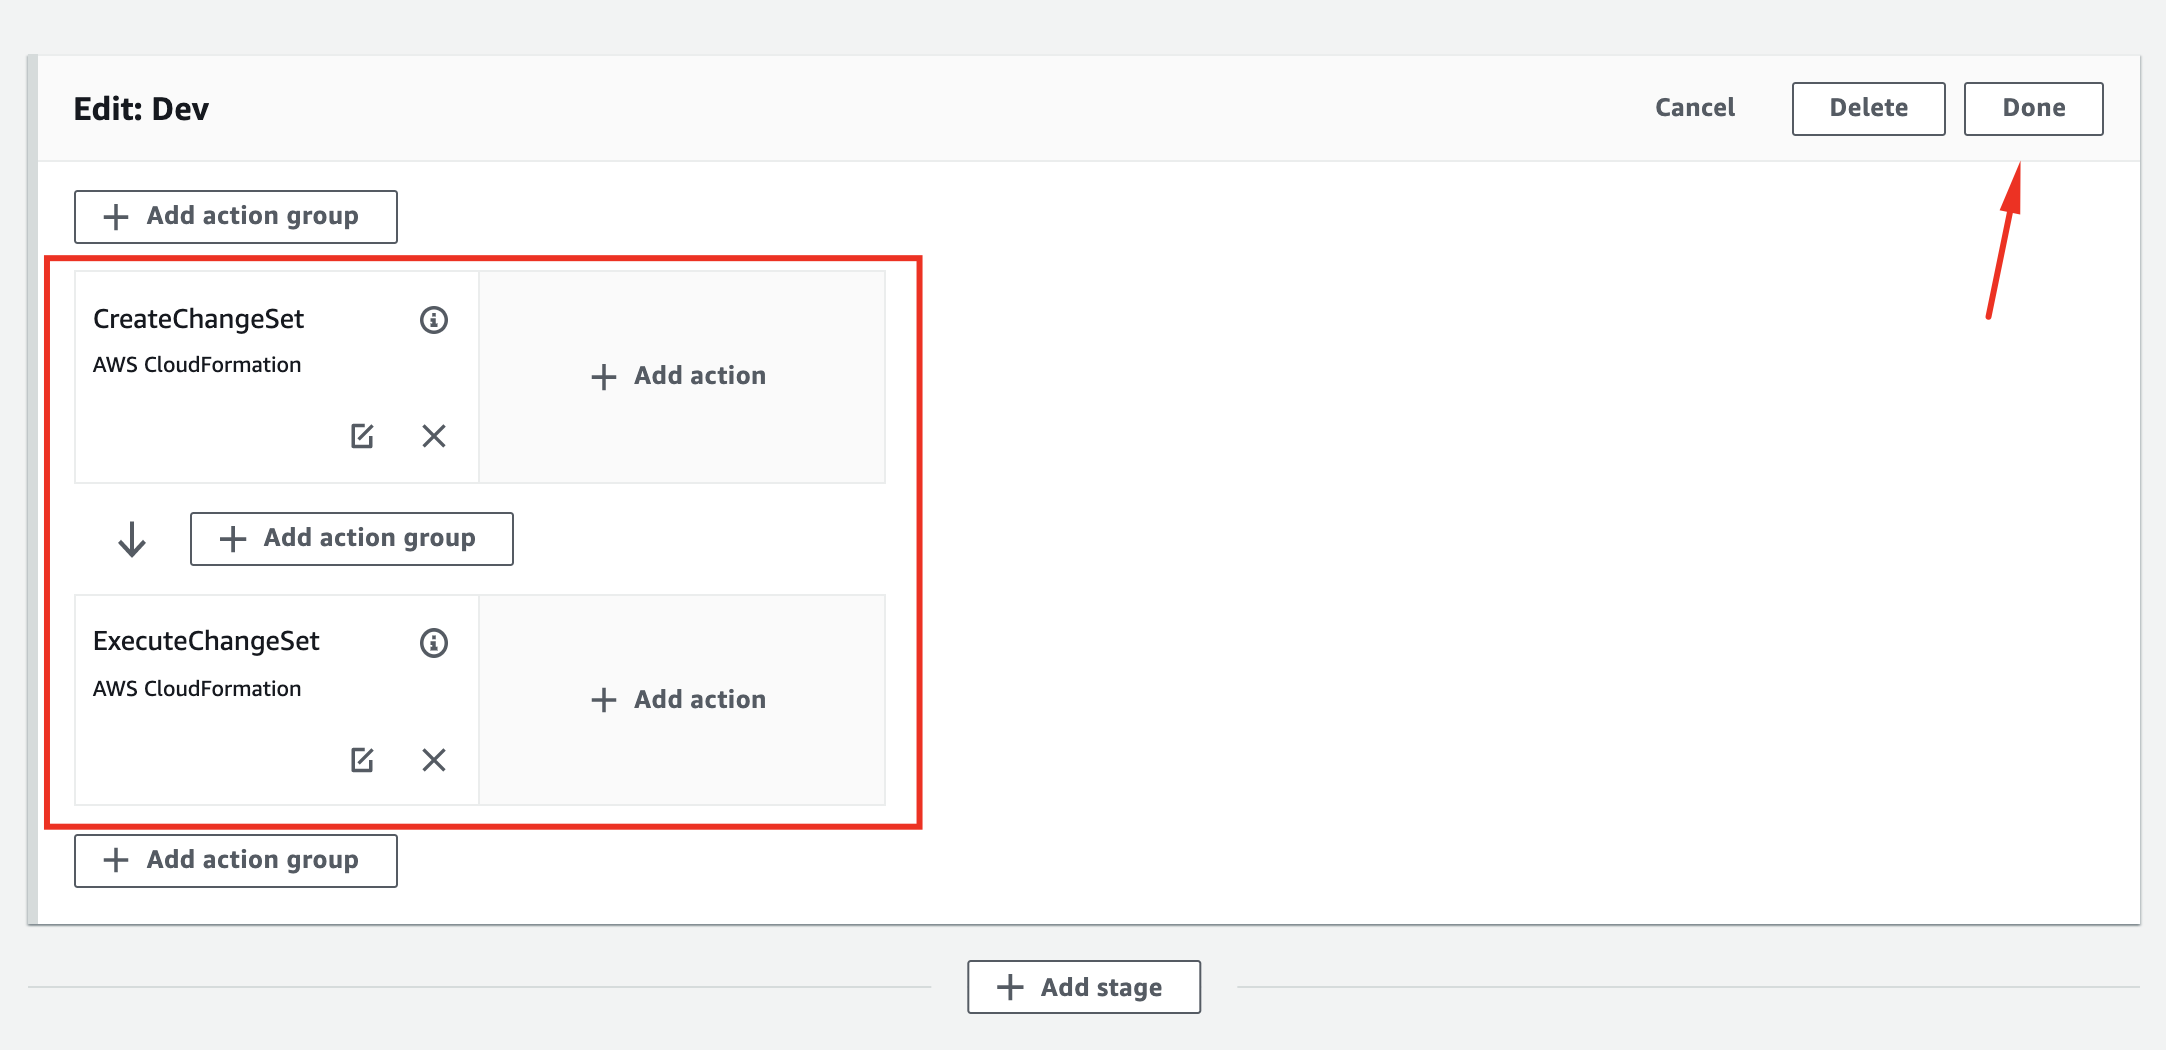
- Click Add action group
- Name it CreateChangeSet
- Select AWS CloudFormation as Action provider
- Select your current region
- Select BuildArtifact as Input artifacts
- Select Create or replace a change set as Action mode
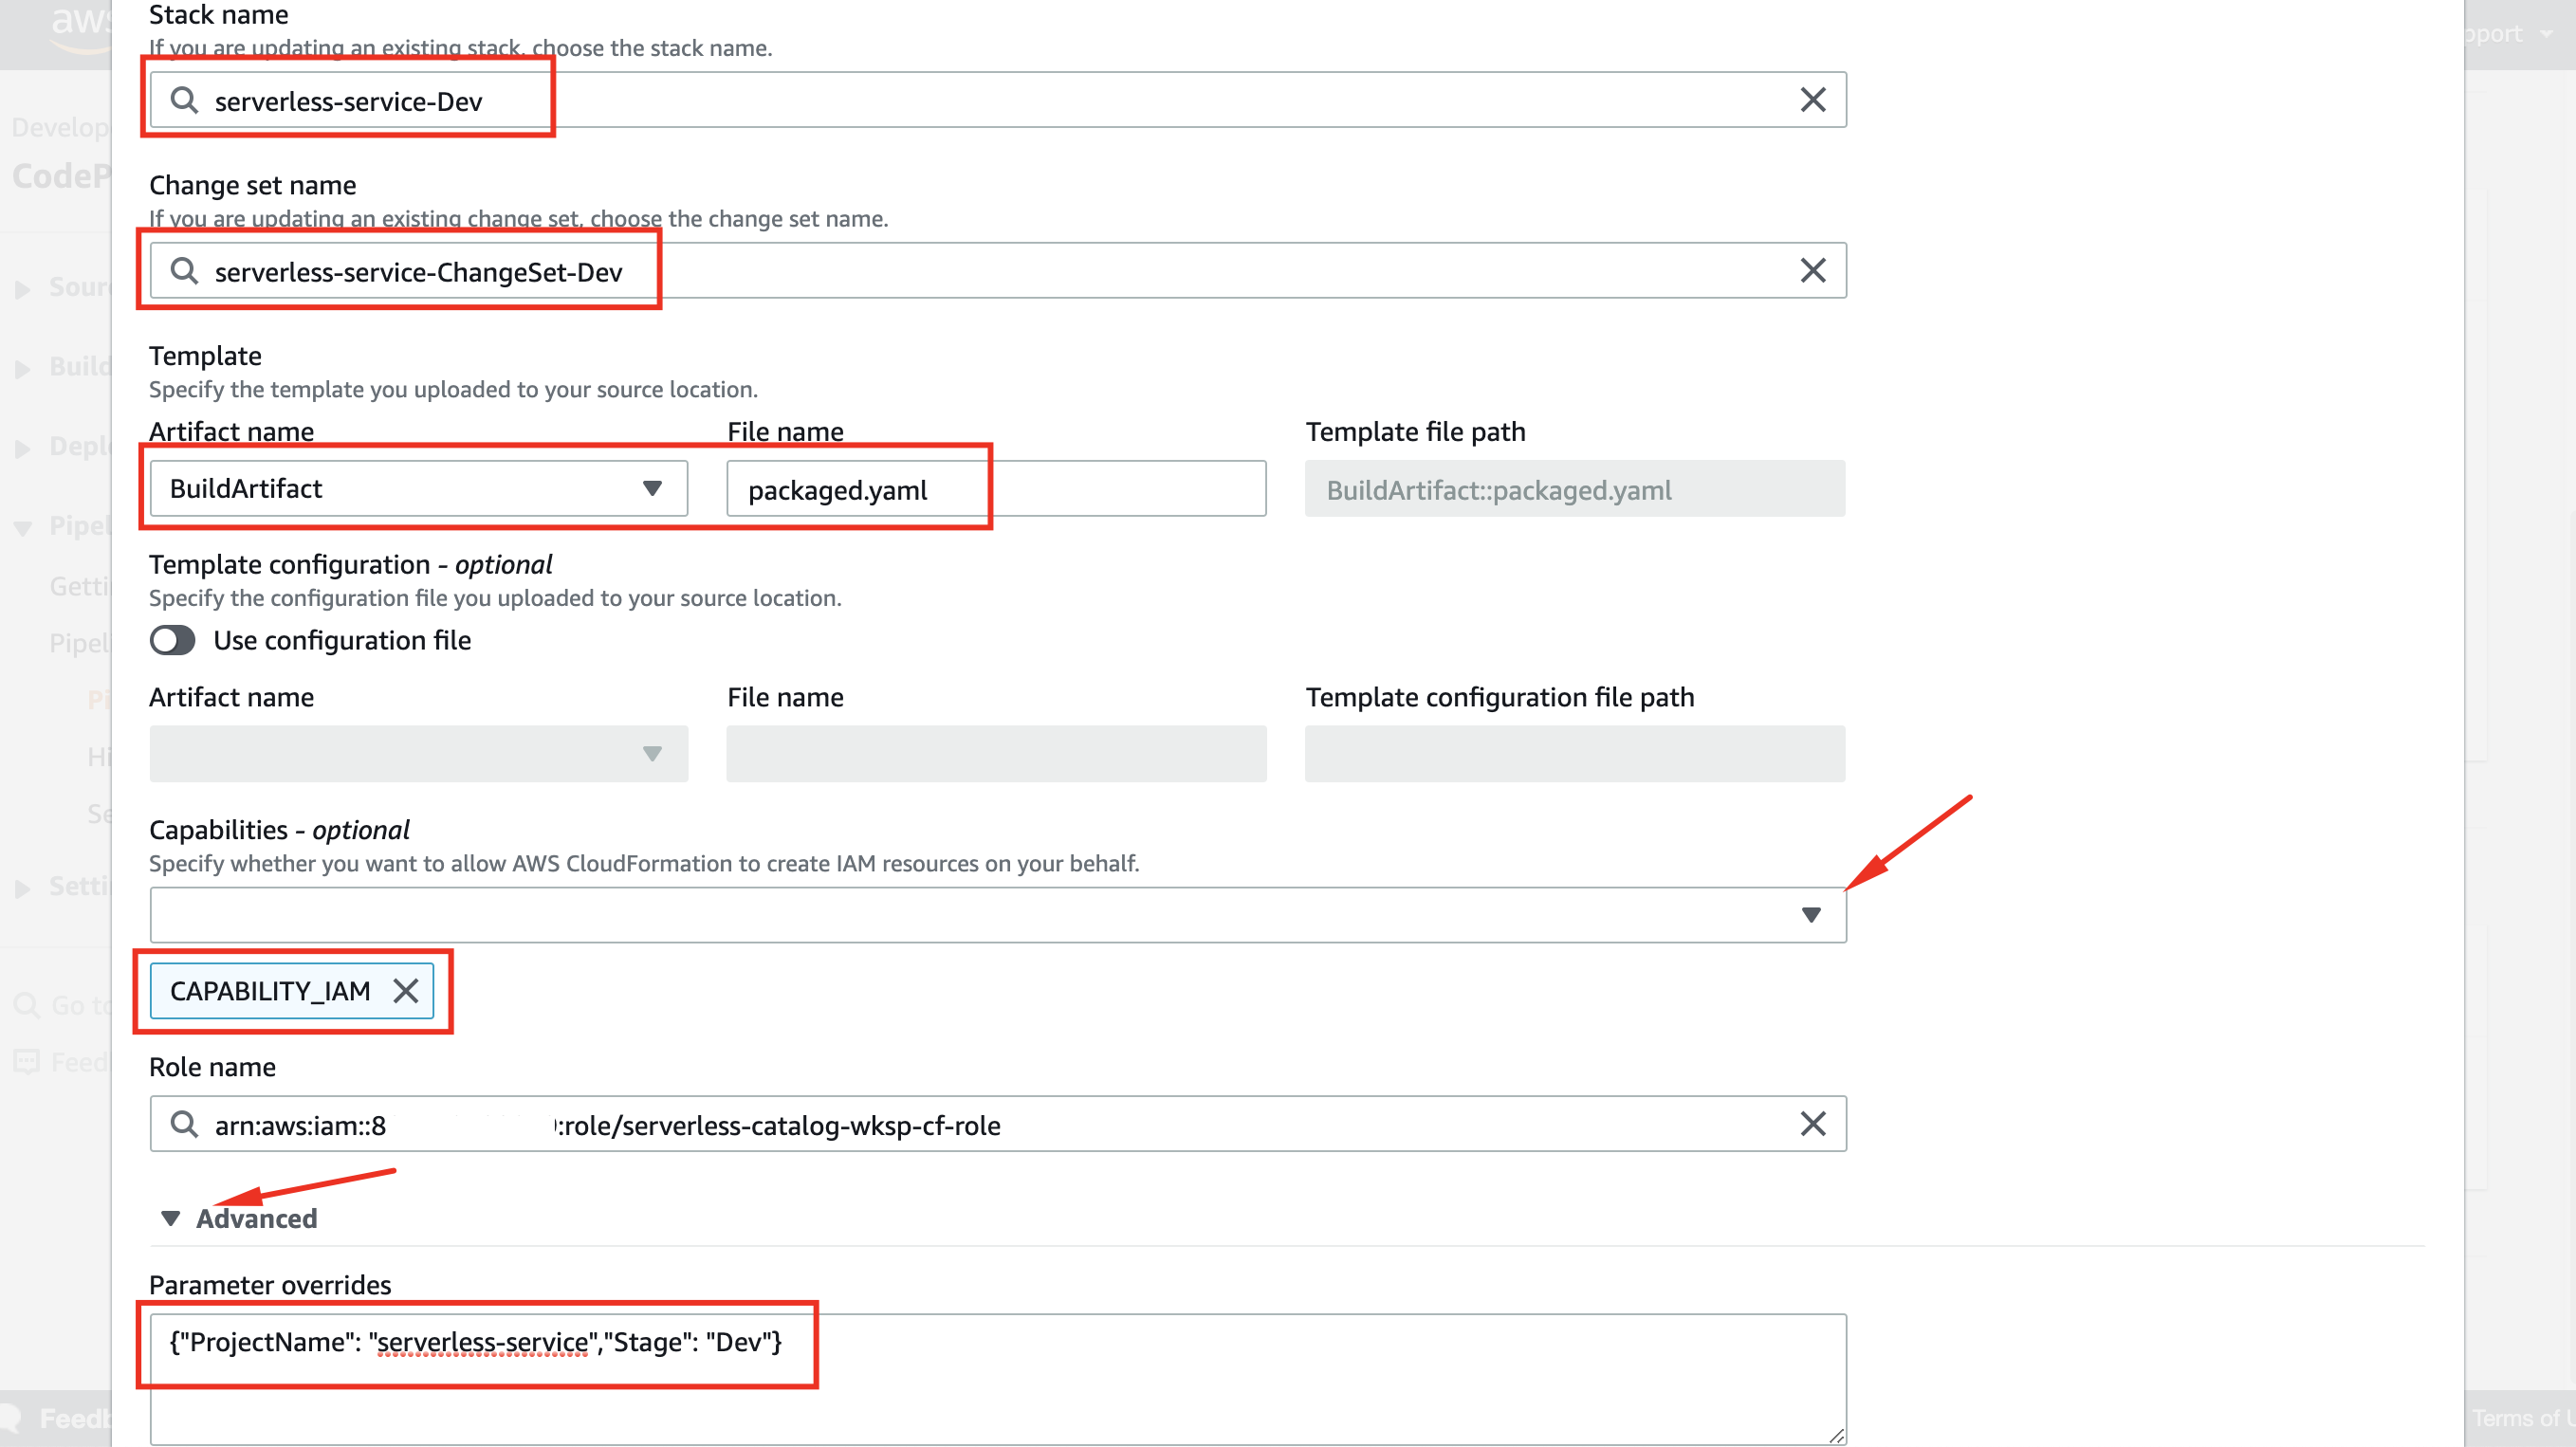
- Type serverless-service-Dev as Stack name
- Type serverless-service-ChangeSet-Dev as Change set name
- Select BuildArtifact as Artifact name
- Select packaged.yaml as File name
- Select CAPABILITY_IAM as (Capabilities - optional
- Browse serverless-catalog-wksp-cf-role as Role name
- Expand the Advanced arrow, type
{"ProjectName": "serverless-service","Stage": "Dev"}in Parameters overrides - Click Done
- Click Add action group below the created CreateChangeSet action
- Name it ExecuteChangeSet
- Select AWS CloudFormation as Action provider
- Select your current region
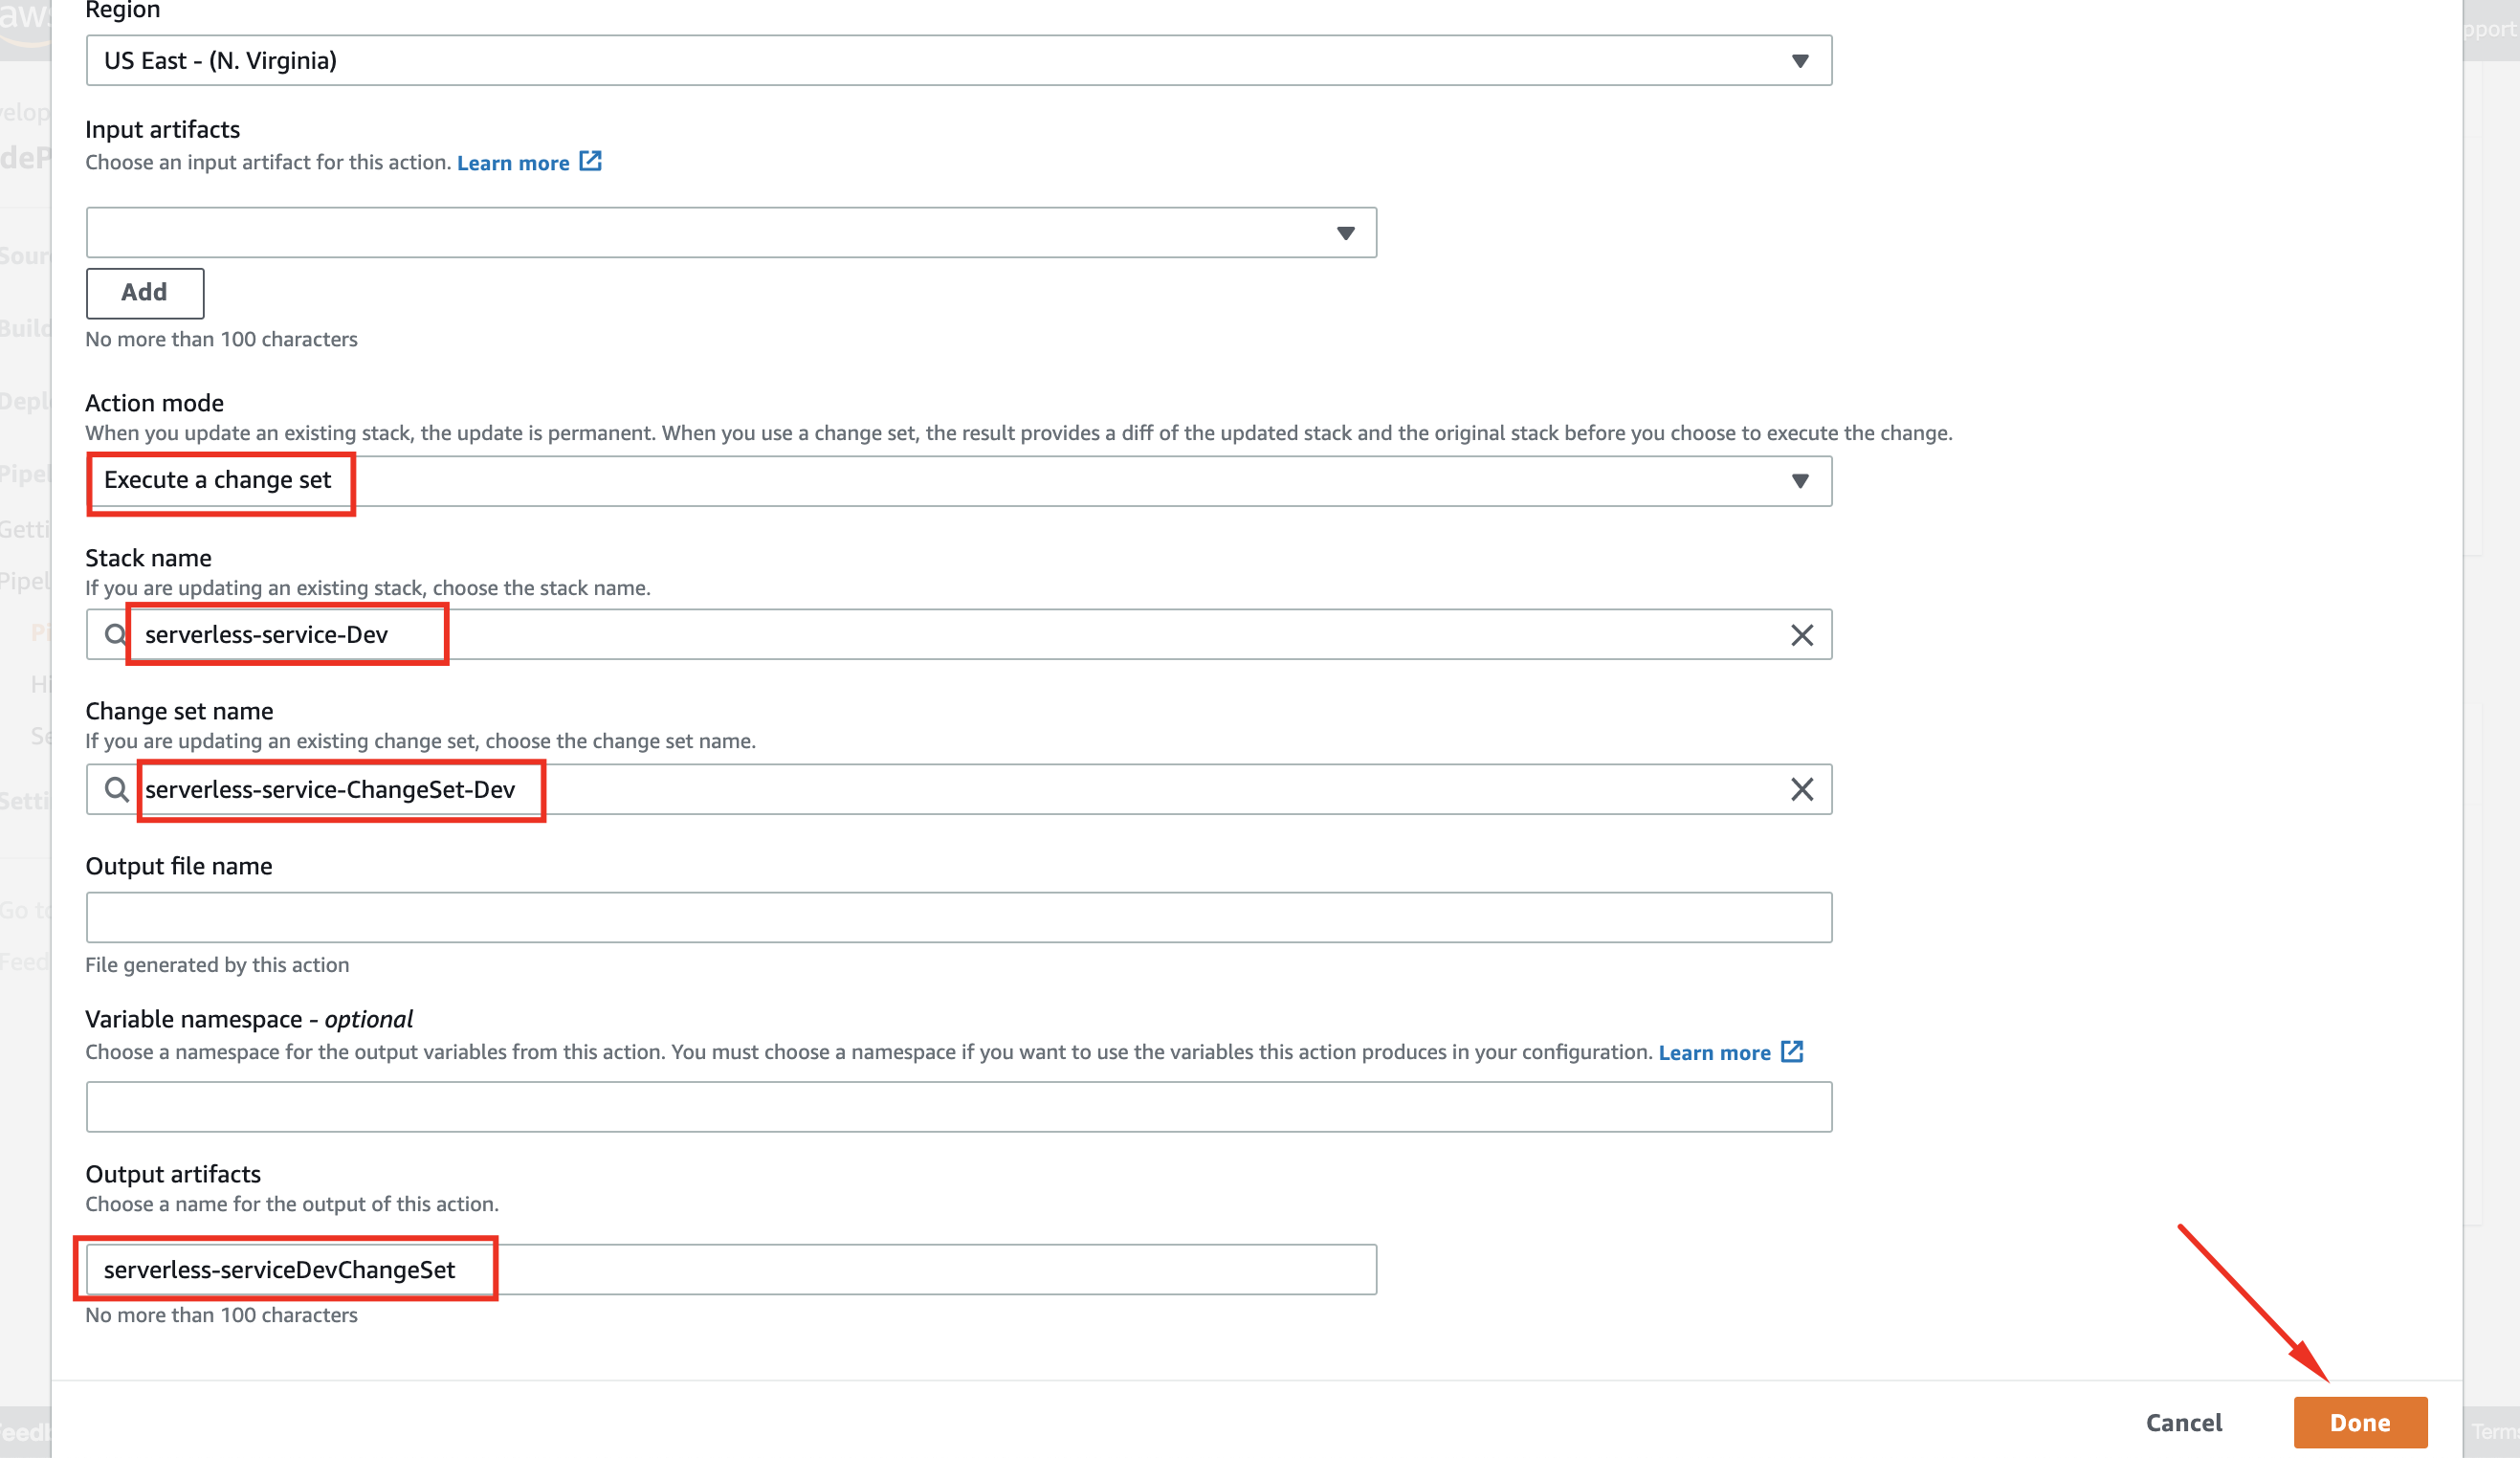
- Select Execute a change set as Action mode
- Type serverless-service-Dev as Stack name
- Type serverless-service-ChangeSet-Dev as Change set name
- Type serverless-serviceDevChangeSet as Output artifacts
- Click Done
- Click Done
Adding a Production Deployment Stage
Now that we have configured the Dev stage, let’s configure a Prod stage to allow multi-environment deployments. First create an action to generate a Change Set in AWS CloudFormation just like in the previous stage.
- Click Add stage below the Build section we just edited.
- Name it Prod, click Add stage
- Click Add action group
- Name it CreateChangeSet
- Select AWS CloudFormation as Action provider
- Select your current region
- Select BuildArtifact as Input artifacts
- Select Create or replace a change set as Action mode
- Type serverless-service-Prod as Stack name
- Type serverless-service-ChangeSet-Prod as Change set name
- Select BuildArtifact as Artifact name
- Select packaged.yaml as File name
- Select CAPABILITY_IAM as (Capabilities - optional
- Browse serverless-catalog-wksp-cf-role as Role name
- Expand the Advanced arrow, type
{"ProjectName": "serverless-service","Stage": "Prod"}in Parameters overrides - Click Done
Now create the action to execute the Change Set.
- Click Add action group below the created CreateChangeSet action
- Name it ExecuteChangeSet
- Select AWS CloudFormation as Action provider
- Select your current region
- Select Execute a change set as Action mode
- Type serverless-service-Prod as Stack name
- Type serverless-service-ChangeSet-Prod as Change set name
- Type serverless-serviceProdChangeSet as Output artifacts
- Click Done
- Click Done again to confirm the changes in the Prod stage.
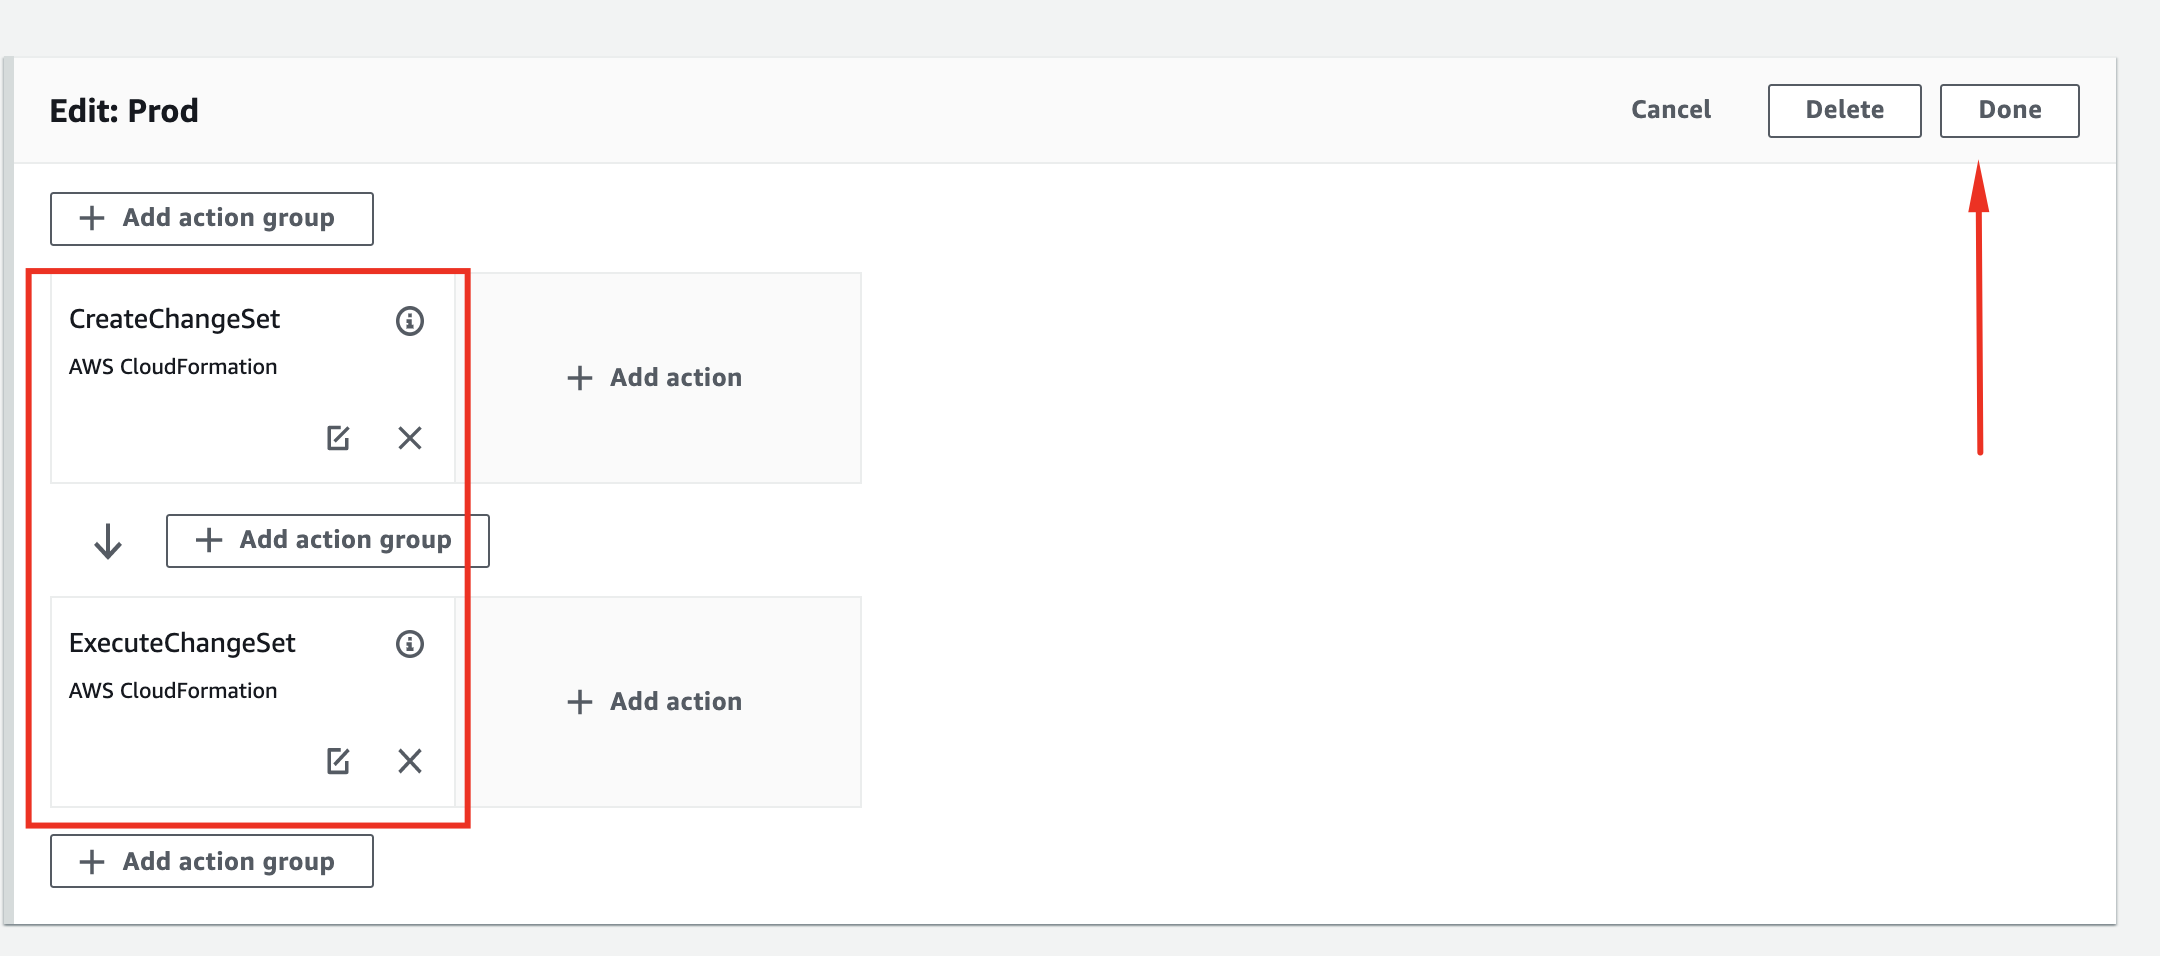
Now we are ready to save all the changes we made to our pipeline.
- Click Save and confirm your changes by clicking Save again.
- Click Release change to rerun the entire pipeline.
Your pipeline should be looking like this:

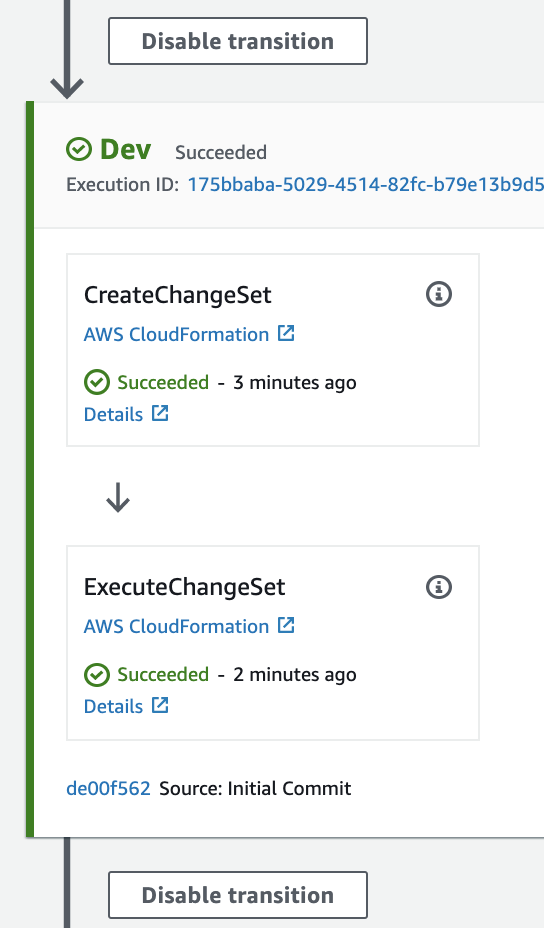
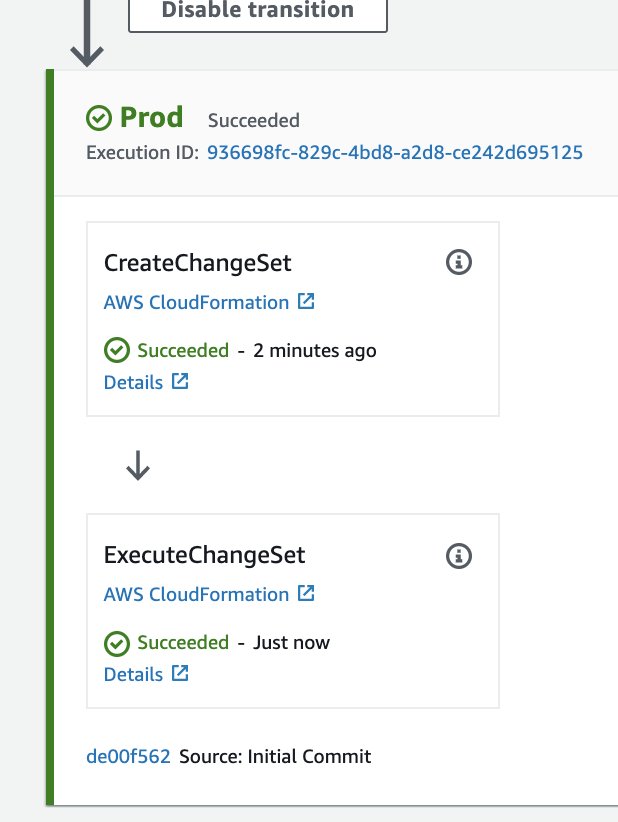
It might take around 8-9 minutes for the whole pipeline to complete.