Trigger New Release
Update Our Application
So far we have walked through setting up a multi-environment CI/CD for our serverless application using AWS CodePipeline and now we are going to make a change to the AWS CodeCommit repository so that we can see a new release built and delivered.
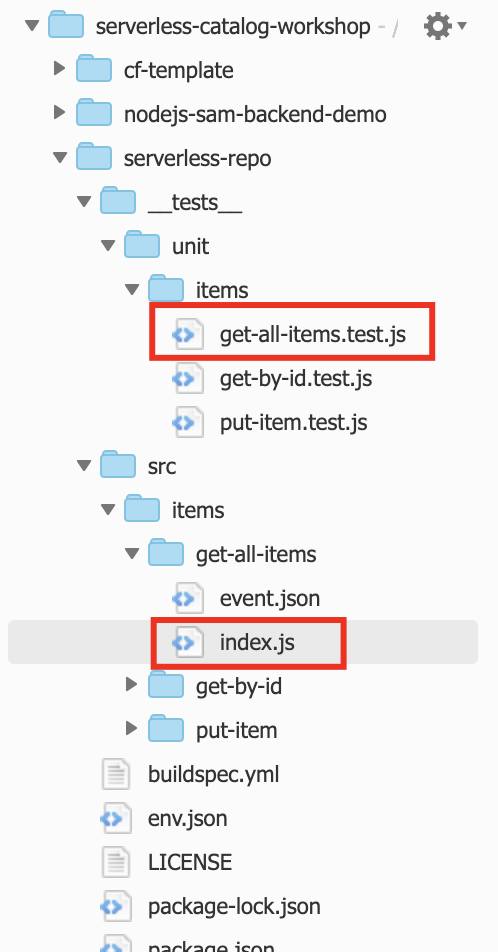
Open your Cloud9 environment and go to your serverless-repo directory.

Navigate to /src/items/get-all-items/index.js file. Change the the code in this line:
    response = {
      statusCode: 200,
      headers: {
        'Access-Control-Allow-Origin': '*'
      },
      body: JSON.stringify(items)
    }
for this code:
    response = {
      statusCode: 200,
      headers: {
        'Access-Control-Allow-Origin': '*'
      },
      body: `This new service now has these items: ${JSON.stringify(items)}`
    }
Since we’re checking Unit Tests in our pipeline, we have to alter the test itself too. Navigate to /_tests_/unit/items/get-all-items.test.js file. Change the the code in this line:
    const expectedResult = {
      statusCode: 200,
      headers: {
        'Access-Control-Allow-Origin': '*'
      },
      body: JSON.stringify(items)
    }
for this code:
    const expectedResult = {
      statusCode: 200,
      headers: {
        'Access-Control-Allow-Origin': '*'
      },
      body: `This new service now has these items: ${JSON.stringify(items)}`
    }
Let’s commit our changes back to our CodeCommit repository.
cd ~/environment/serverless-repo
git add .
git commit -m "Change the message text"
git push
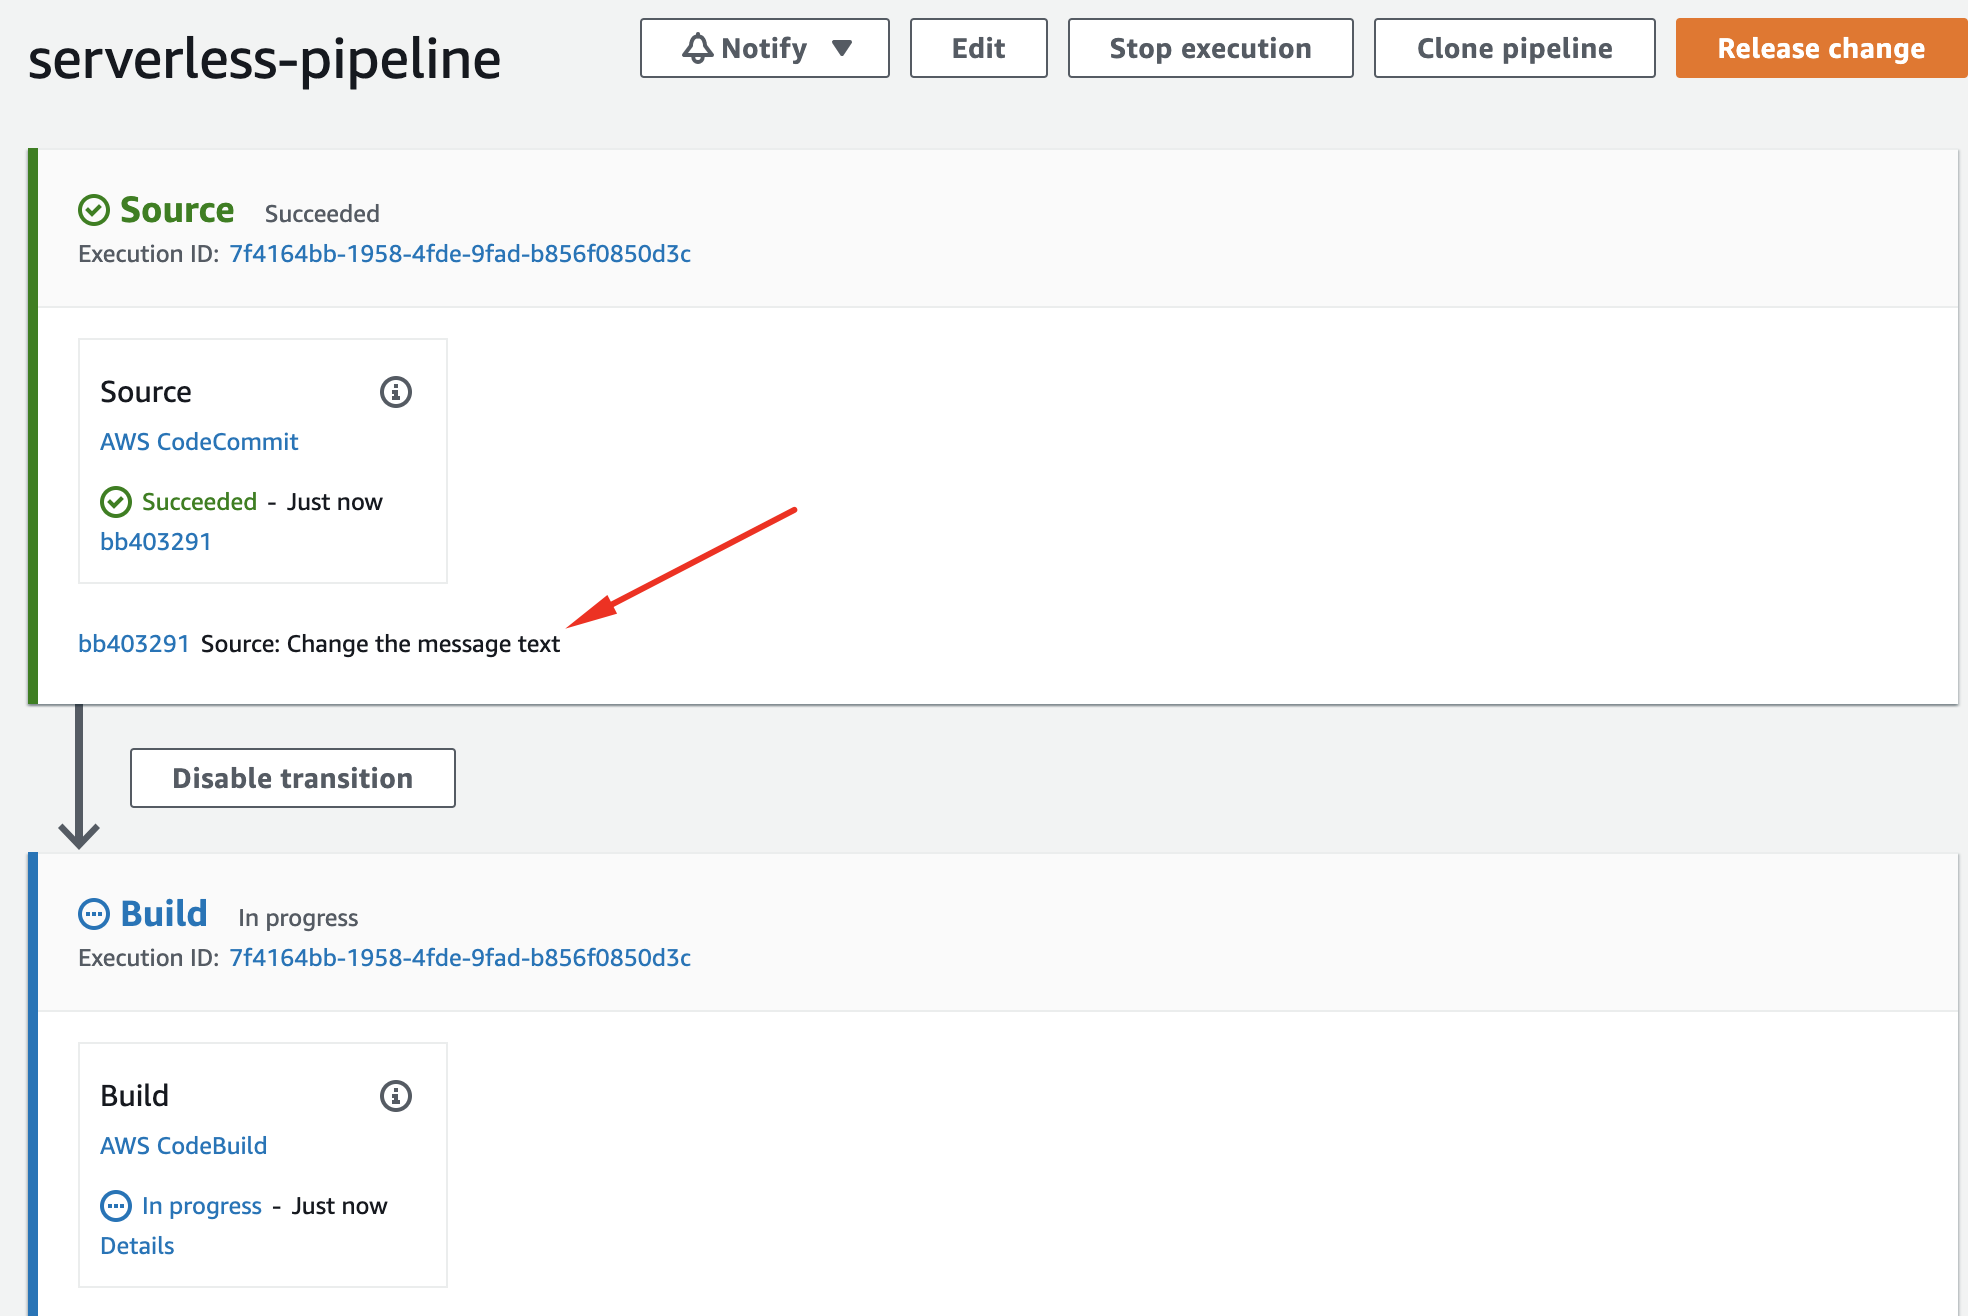
After you modify and commit your change in AWS CodeCommit, in approximately 30 seconds you will see a new build triggered in the AWS CodePipeline pipeline.

It might take around 8-9 minutes for the whole pipeline to complete.
Confirm the Change
Let’s test our Development API.
export ApiUrl=$(aws cloudformation describe-stacks --stack-name serverless-service-Dev --output json | jq '.Stacks[].Outputs[] | select(.OutputKey=="ApiUrl") | .OutputValue' | sed -e 's/^"//'  -e 's/"$//')
echo "export ApiUrl="$ApiUrl

curl -X GET $ApiUrl/items/
This new service now has these items: []